


I don’t know if I’ve expressed to the right extent just how much I love ClickUp, it is everything I ever wanted in a project management tool and more!
I’m going to walk you through creating, saving and updating templates within the ClickUp template library. This feature is probably the biggest time-saving hack of all time. I couldn’t tell you have many hours ClickUp saves me just from this feature alone.
I am for sure someone that needs to have a list, a to-do list, a checklist something that guides me through a process. Even if I’ve done that process a million times, I just find that having a checklist gives me more confidence as I complete a task because I know that I’m not forgetting anything.
So if that sounds like you then stick around because I’m pretty sure what I’m about to show you is going to blow your mind!
If you’re new to ClickUp then I suggest checking out my post, A Beginner’s Guide to ClickUp where I explain exactly how it works, show you around my ClickUp and walk you through how to go about setting up your own workspace.
Firstly, let’s talk about the Template Library. This is accessible through the quick actions menu in the top right corner. Here you’ll be able to view any templates within your organisation as well as hundreds of community-created templates that you can use and customise to suit the needs of your business.
To download a Template from the Library simply click on the template you want and then press either ‘use template’ if you want to work on it straight away, or ‘add to library’ if you want to add it to your library to work on at a later date.
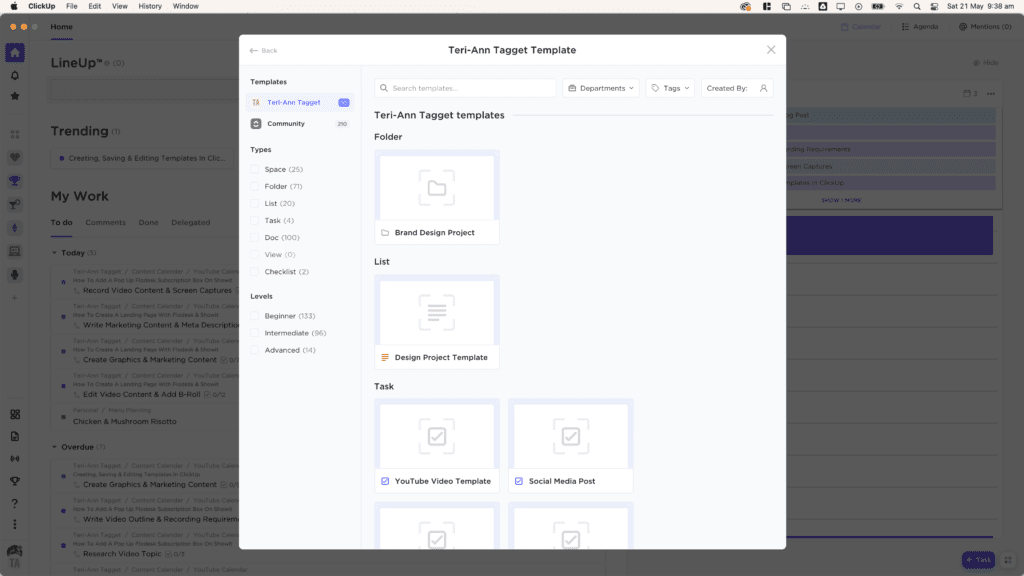
As you would have seen in the Template Library, you are able to create templates for most features within ClickUp including Spaces, Folders, Lists, Tasks, Doc and Checklists. Although the process is pretty similar for each of them I will still walk you through each one just so you can really get an idea of the endless possibilities of this feature.
Creating A ClickUp Space Template
Let’s say you have built out a space with particular lists, statuses etc. that you want to use as a base template for all departments within your business. To create the template, enter the space you want to use and select the 3 dots to the right of the Space name, this will take you into your spaces settings menu. From here click on Template Centre and select ‘save as template’.
Enter a name for your template, you can also include a description and tags if you’d like. The next section is where you can select who within your workspace can access the template once it’s saved. The next option is Public Sharing which gives you the option to make your template public, meaning it will be accessible to anyone via the Template Centre.
Then we have probably the most important section when saving your template which is the import options, if you select ‘customize included items’ you’ll see everything that is being imported within your space to the template.
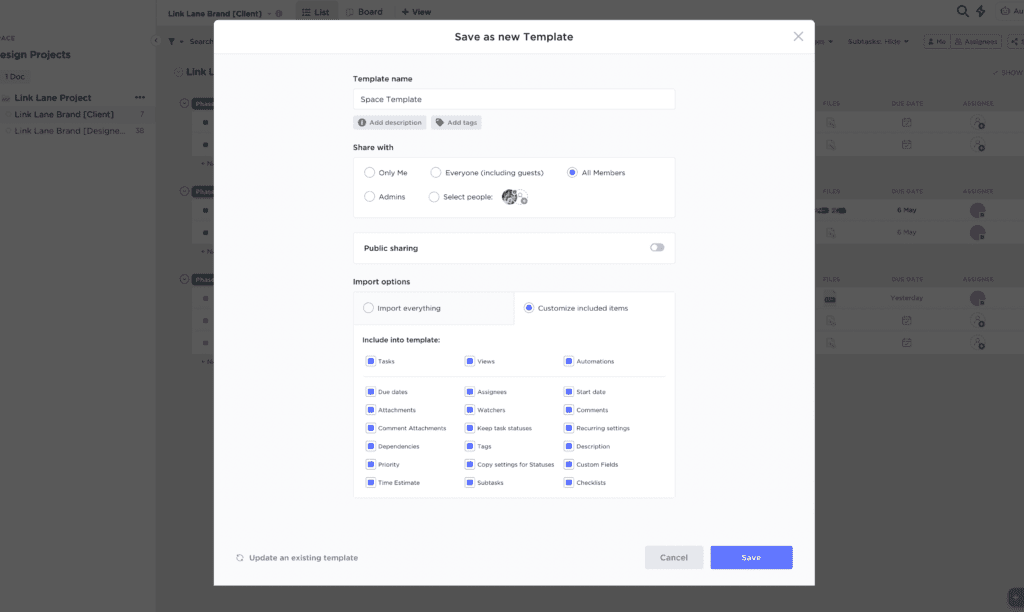
Take your time here and ensure you are only importing the items you need. You may not want certain things such as comments, attachments, due dates, assignees etc. to be imported with the template so be sure to unselect anything that isn’t necessary.
Once you’re happy with the import items, hit save & your template is created!
Now let’s say you’ve made some changes to the Space that you want included within your template, all you need to do is follow the same steps above to access you space settings, then template centre but instead of creating a new template we are going to select ‘update existing template’. From the window, select the template you want to update and follow the same process as before being sure to check those import item options.
If you have concerns about accidentally overriding items or saving items that don’t need to be, another way to update a template is to create a completely new Space from your saved template, make the necessary edits to the template, follow the above steps to update the existing template with this new space.
Then once it’s saved as a template you can simply delete or archive the space. This works for all of the other features I’m about to cover.
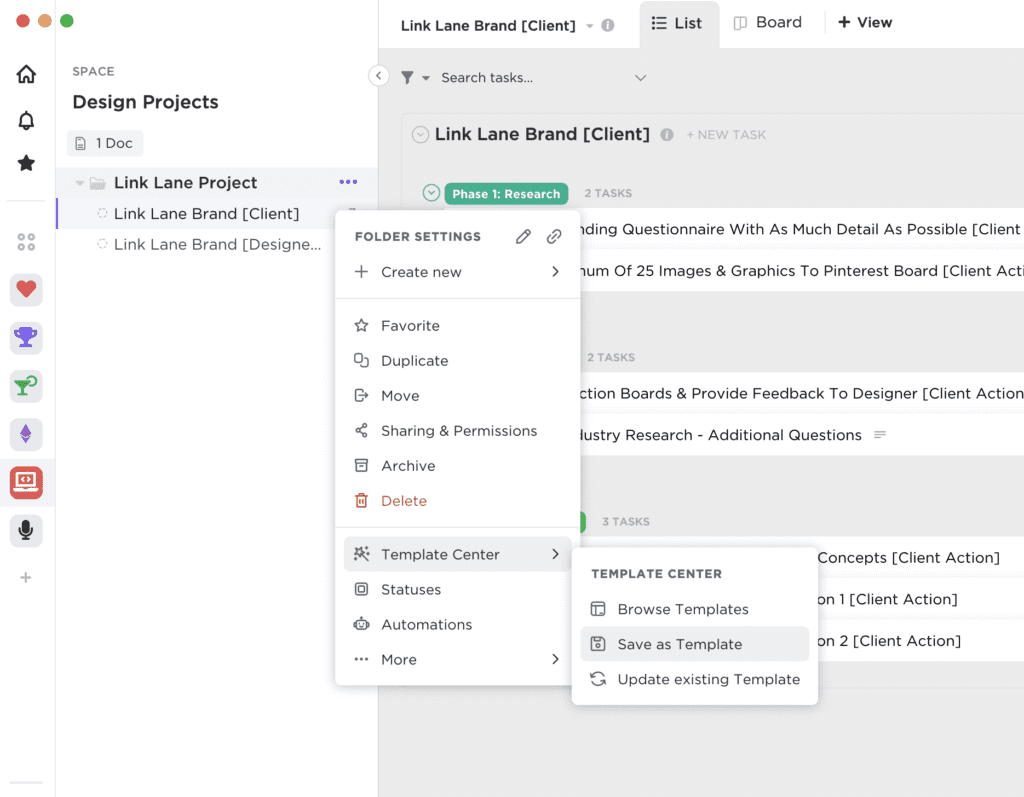
To access any of the Templates you’ve created, navigate to the area you want your template to be housed whether that’s within a Space, Folder, List or Task. Select the 3 dots again to access the settings, then select ‘Template Centre’ and ‘Browse Templates’.
You’ll see on the left-hand side that it will automatically have the location that you selected as the Type of template (Space, Folder etc.), unselect these and select the type of template you want to add.
You will then be able to see all of your saved Templates as well as community Templates. Select the template you want to use, it will then ask you to confirm where you want it located and the import settings. Once you’ve done this, select ‘Use Template’ and it will create a duplicate of your template for you in your chosen location.
Creating ClickUp Folder & List Templates
Folders & List Templates can be created and updated the exact same way as Spaces. Simply navigate to the Folder or List that you want to save as a template, select the 3 dots to the right of the Folder or List name, navigate to the Template Centre menu, and follow the same steps above to save as a template.
Creating Task & Checklist Templates
Again, Task & Checklist Template are created the same way as I’ve already covered but I’ll run through it quickly so you can see where the menu option appears for each of these.
To access the Template Centre for a Task Template, open the task that you want to save, then in the top middle you’ll see the 3 dots for the task settings, then just follow the same process as before.
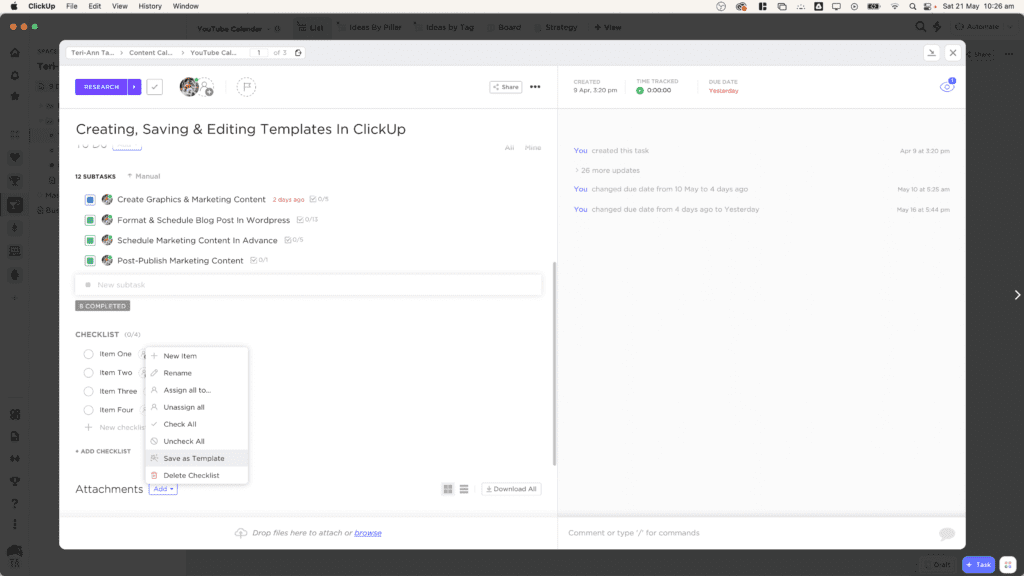
Checklists are smaller lists within a task that can be located under the sub-task section, these are great if all you need is a simple to-do list. Now let’s say you’ve created a checklist that you want to be able to use across different kinds of tasks, add your checklist as a template, open the task where the checklist is located, and scroll down until you see your checklist.
The 3 dots will be next to the large Checklist heading, from that menu you’ll have the option to ‘save as template’.
Creating ClickUp Doc Templates
The final feature that you can create templates from which is probably my favourite, Docs! I feel like I’m repeating myself at this point but again, the process is pretty much the same as the previous ones but I’ll quickly walk you through it.
Open the Doc that you want to use as a template, then all you need to do is select the little wand on the right-hand side and at the bottom of the menu select ‘save as template’, it will then take you through the same process as before.

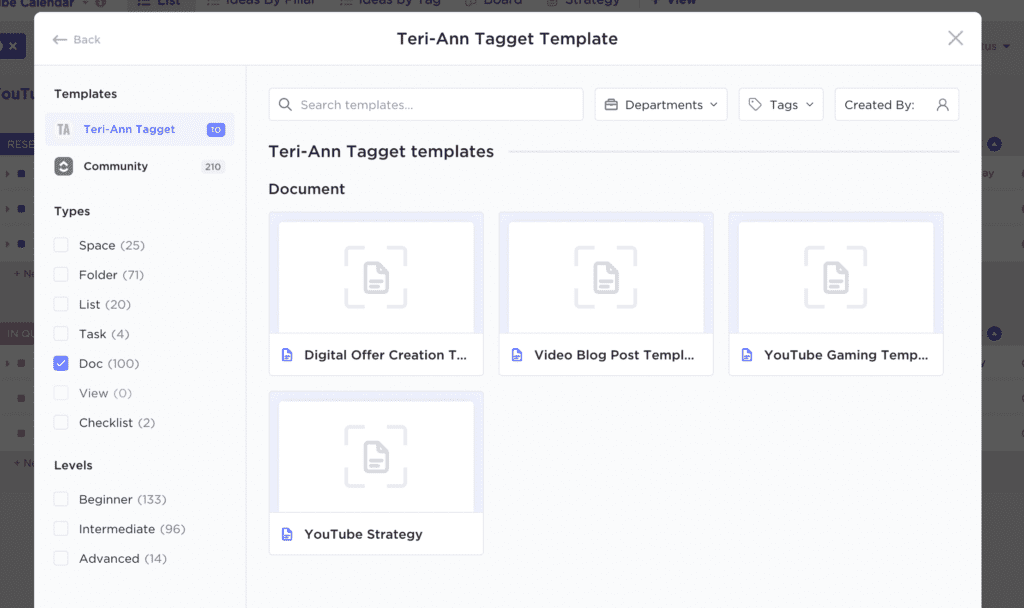
To access a Doc Template, navigate to the area you want your Doc to be housed whether that’s within a Space, Folder, List or Task. Select the 3 dots again to access the settings, then select ‘Template Centre’ and ‘Browse Templates’. You’ll see on the left-hand side that it will automatically have the location that you selected as the Type of template (Space, Folder etc.), unselect these and select Doc.
You will then be able to see all of your saved Doc Templates as well as community Templates. Select the template you want to use, it will then ask you to name the Doc and confirm where you want it located. Once you’ve done this, select ‘Use Template’ and it will create a new Doc for you in your chosen location.
There we go, a complete tutorial on how to make templates for pretty much everything within ClickUp. If you haven’t yet given ClickUp a go I’ve included a link below so you can sign up and get started for free. Honestly, it has been an absolute game changer for me on both a personal and business level.
I hope you found this tutorial helpful and if there are any other ClickUp features you’d like me to cover please leave me a comment below.
Disclaimer: I sometimes include affiliate links within my posts for my fave products. If you click and purchase, I may receive a small commission at no extra cost to you.


0
Comments