If there is anything you need to know about me it’s that I’ll take every and any opportunity to talk about Clickup.
In this tutorial, I’m going to be giving you a little look behind the curtain, a little sneak peek into how I manage my life and business using just two tools, ClickUp and Google Calendar.
Google Calendar
So I have four main calendars that I use. I know that sounds excessive, but let me explain.
First, we have my Business Calendar. This is anything related to my business that has a set date and time where I need to be or make a call or something like that.
And then within my Personal Calendar, I have three calendars.
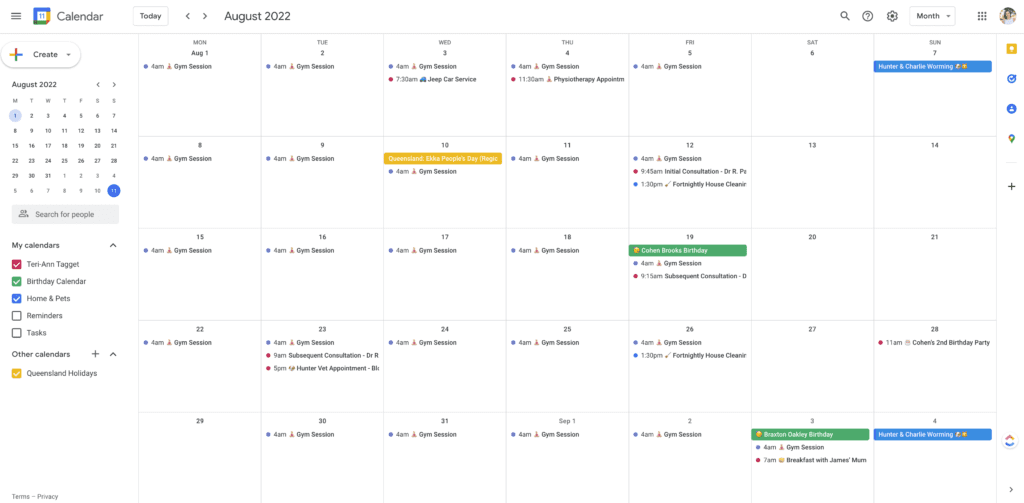
The first one is my General Calendar, which is for any personal appointments that I have for any kind of appointments such as doctor’s, hair appointments etc.
I also use this for any lunch dates with friends so that time is blocked off in my calendar. I also use this for any task blocking.
You’ll see that Monday to Friday, I have a task block in there for my gym session. This is kind of like a mental thing for me to be like, okay, you have a set day and time that you have to be at the gym, which helps make me do it.
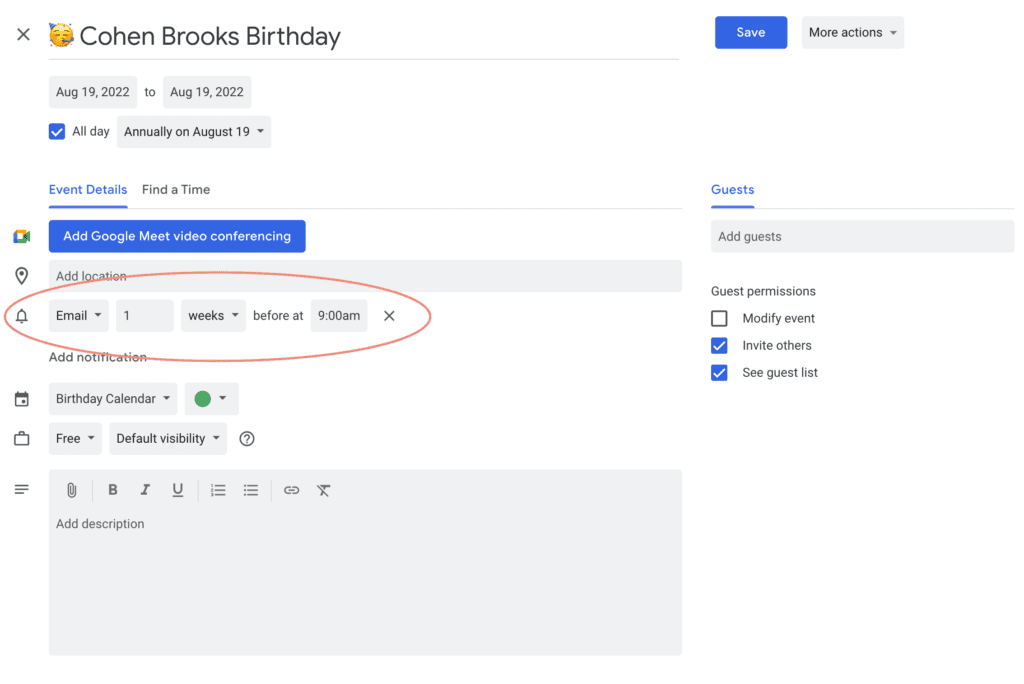
Then I have a Birthday Calendar, which is just that it’s a calendar specific for birthdays. I also have these set up with an email reminder.
Google Calendar has the option under notifications to create an email notification. So all of my birthdays within this calendar have an email reminder set up which sends an email to my inbox a week before the actual birthday.
The last calendar I have is Home and Pets. This is a shared calendar with my partner so that we both know whenever Hunter and Charlie (our fur babies) are due for their worming, if they have any vet appointments etc.
I’m also subscribed to a public calendar for the Queensland public holidays because I live in Queensland, Australia and it’s just nice to know when we have holidays coming up.
ClickUp
Now the next part is ClickUp and I tell you, I could talk all day about ClickUp all day, no joke!
ClickUp has completely transformed my life and business, and allowed me to be so much more organised and reduced the amount of overwhelm I would usually be feeling from the amount of stuff I am pushing myself to do.
Home Section
The first area you’ll see when logging into ClickUp is the home screen which on a day-to-day basis, is where I spend the majority of my time and I feel like this is an underutilized feature with ClickUp.
I’ve watched so many ClickUp tutorials and I feel like this just gets skipped over and I don’t know why because I am obsessed with it, I love it. I use it every single day.
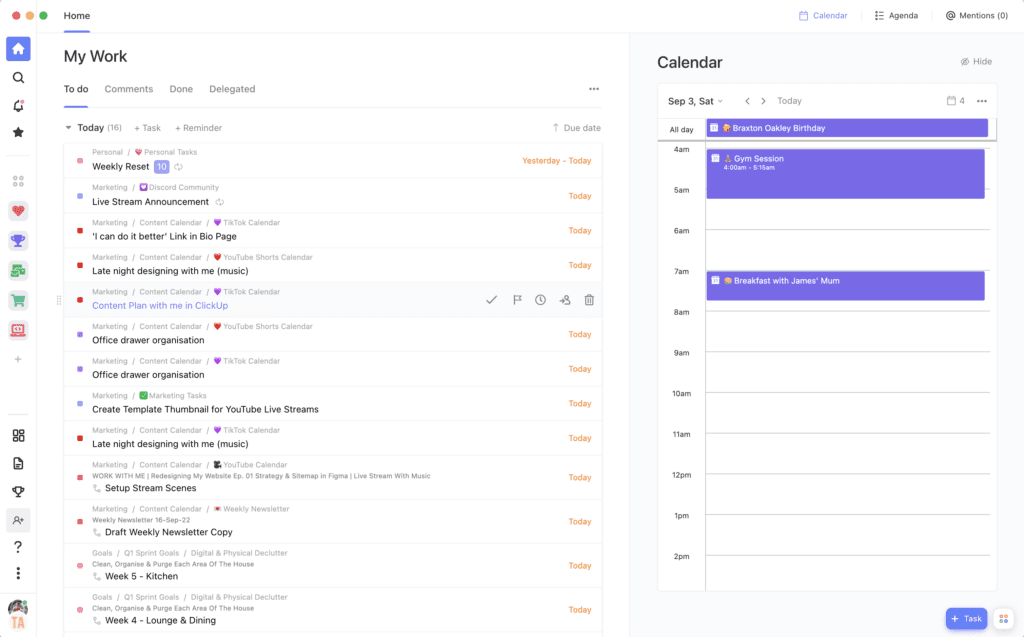
On the left is the My Work section. This will show you any tasks that are allocated to you that are due today. You can also see any overdue tasks below this as well as tasks that are coming up next
On the right-hand side is your Calendar. Here I have linked my Google Calendars to ClickUp. You can link multiple calendars with ClickUp, not just the one linked to your account email. Calendar events will show up in purple
So I never actually have to go into my Google Calendar unless I’m adding an event or appointment. I just look at it from ClickUp on a day-to-day basis.
ClickUp Spaces
You’ll see on the left-hand side here that I have five Spaces within my ClickUp Workspace. I have Personal, Goals, Marketing, Client Projects and Digital Products.
You can set up your spaces however best suits your life and business needs and priorities.
Personal Space
Within my Personal Space, I use this to manage all of my personal life tasks that I want to keep track of, things that I want to do, and things that I need to do or remember.
Personal Tasks List
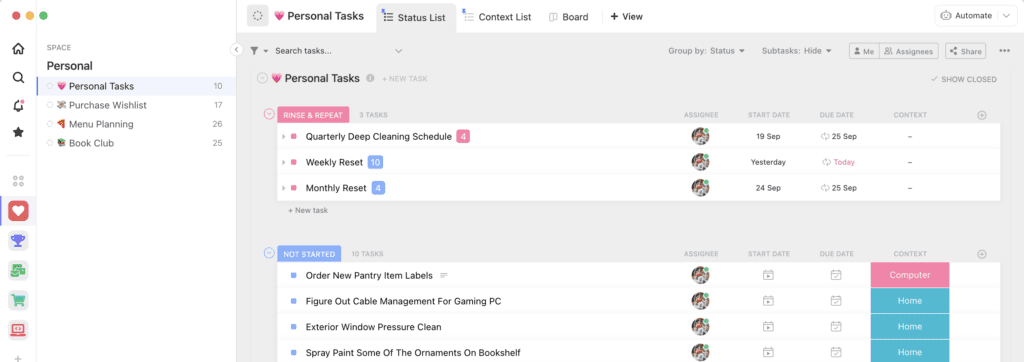
My Personal Tasks List is where I keep a running list of tasks or projects I want to complete on a personal level.
I’ve got a Rinse and Repeat category, which are checklists that I aim to complete regularly. I have a Weekly Reset, Monthly Reset and then a Quarterly Deep Clean checklist.
These are all set to automatically repeat on a schedule. Each time I complete the checklist it will automatically create a new blank one per the schedule I’ve set it for.
All the other ad-hoc tasks that I want to get done at some point will be put under the To-Do category. I’ll also contextualise these depending on whether they are to be completed at home, on the computer, if it’s an errand etc.
Purchase Wishlist List
This list is for anything that I want to or am considering purchasing at some point. For example, if I need to get a new pair of white sneakers I’ll put them on this purchase wish list.
That way the next time I’m at the shopping centre or near a particular store I can check my list for anything I might need. It also helps me to think through my purchases before I make them.
Menu Planning List
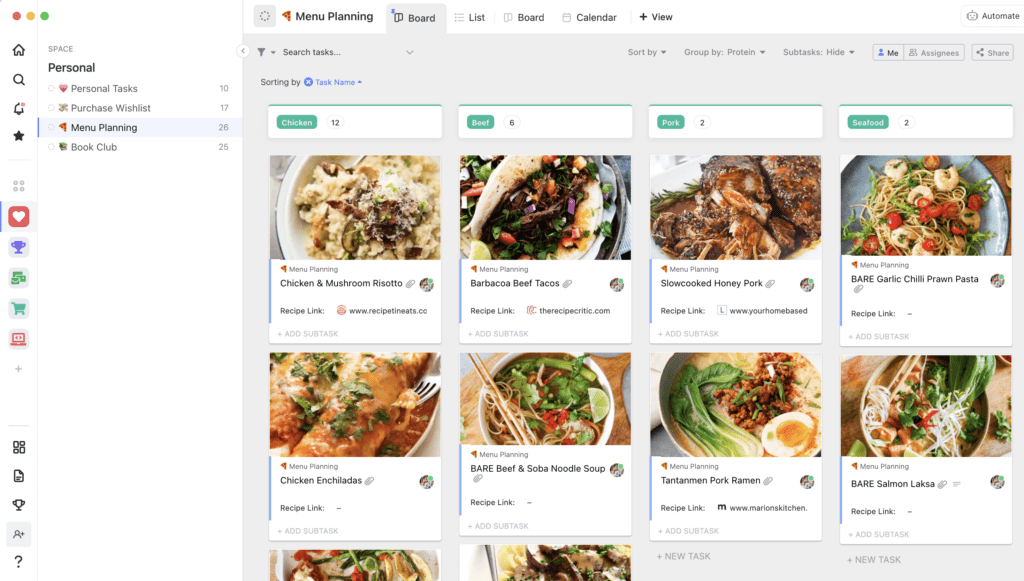
I keep a library of our favourite recipes so each week when I’m doing our grocery list, I can just go in here and decide what we want to eat for the week. We don’t have to try and scour the internet trying to decide what to eat each week.
I’ve also downloaded a photo of the recipe from the blog where I get the recipes for aesthetics, and I also have the recipe link on the recipe card.
So all I have to do when I’m doing my grocery list this week is decide what we want to eat from the list, click on the link and write out my grocery list.
Goal Space
Each quarter I set 12-week goals for myself and my business. I’ll create a list for each goal where I break down the actionable steps required to achieve each goal.
I like to keep these separate from all of my other general tasks and deadlines so that I am more intentional about achieving them.
Marketing Space
The main area within this space is my Content Calendar Folder. I have all of my content and social platforms in individual lists within that folder.
I’ve set it up this way so that I can drill into each platform individually, as well as be able to see everything at a glance in calendar view at the Folder level. I have each platform colour-coded so I can easily see what content is going to be published and when.
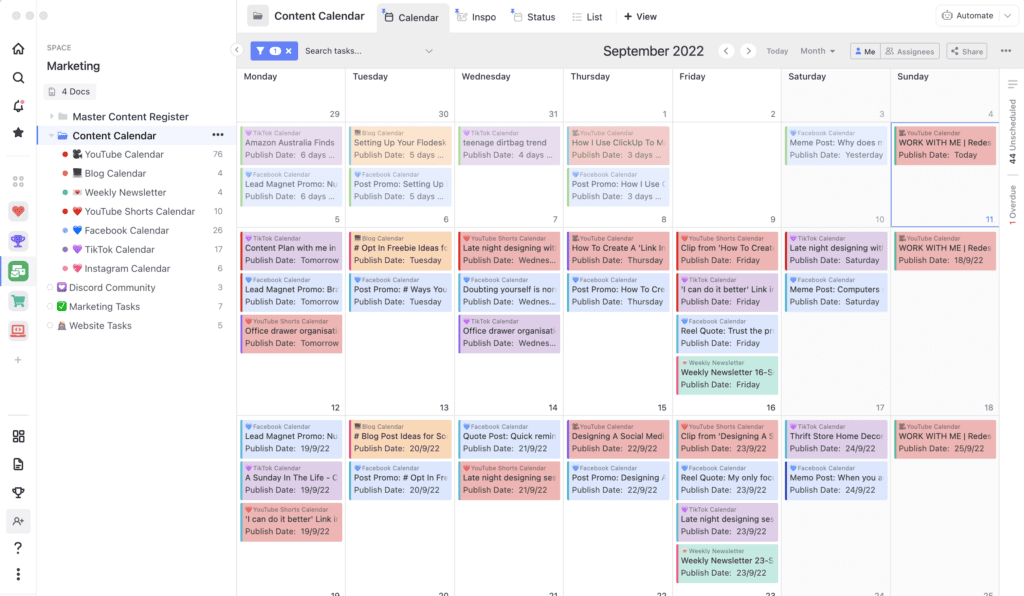
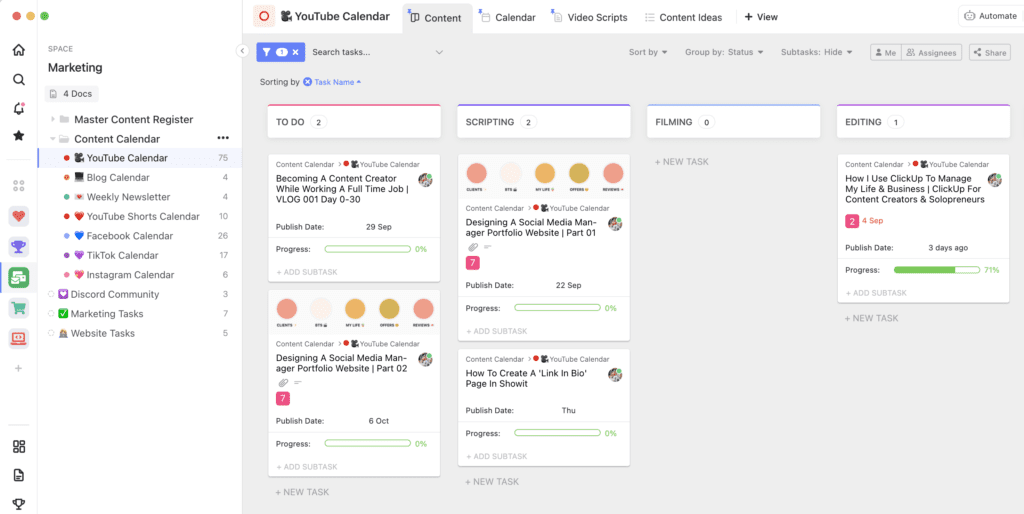
Within each content list, I break these up into different views. I have a board view for all content pieces that are in progress.
Another view is a list of content ideas, that I can refer to when planning out my upcoming content.
I also keep all of my video scripts in a Doc View. ClickUp has a document system within it which is one of the best features and what originally sold me on the platform.
You can add them at each level of your Workspace, within a folder, a task or a list view as I have done within my YouTube Content List.
One mistake I made when I first started using ClickUp was to create a new document for every single YouTube video script, which meant that I ended up with A LOT of documents.
My process now is I only have one document for my YouTube video scripts with a sub-page for each script. One document keeps everything together. It makes it easy to refer to it, and I can still link each of the sub-pages to the relevant video YouTube videos.
Marketing Tasks List
This is a list of all marketing-related tasks that I want to do, need to do, or think of at any point. They get put on this list and then each week I will review these tasks and see if there’s anything that I can add to my coming week that needs to get done.
Website Tasks List
I have website tasks separated from marketing tasks because these are either little things that I need to finish or updates I need to make on my website. I’ll also plan out any sales or additional pages I’m launching within this section.
Client Projects Space
Each of my clients has a folder because I have a list of my tasks and I have a list of their tasks so that they’re only seeing their tasks and not all of the individual tasks that I have, which includes things such as setting up a folder, sending a proposal, you know, the stuff they don’t need to see.
I’ll set them up with a list first, but then I create a client dashboard for them, which I’ll show you in a second as well.
I also have a working template folder because I am always slightly tweaking and refining my client process so I’ll make all the adjustments within the working folder, and then update the project template within the template centre.
If you want more information on ClickUp Templates you can read more about this in my post about How To Create, Save & Update ClickUp Templates.
Client Tasks & Database
I also have a client design task list, again this is for ad-hoc miscellaneous tasks that are related to client work that I want to get done at some point. There aren’t usually too many tasks that get added here, however, I just like to have a place for them if I do.
The Client Database List is where I just keep track of all my design clients including information such as contact details, project details and testimonials.
ClickUp Dashboards
Dashboards are a feature that when I first started with ClickUp, I didn’t see the point of them. I didn’t think I was going to use it and just kind of ignored them for a while.
However, I watched a YouTube video about using Dashboards to create Client Dashboards which piqued my interest.
I now use the Dashboards for Client Dashboards, as well as Dashboards for curating my Tasks Lists and Content Lists.
Client Dashboard
Within my Client Dashboard, I provide them with a video walking them through their project and how to use the Dashboard, some contact information, access to their Google Drive, access to the client lounge, a chat section, and then obviously their list of tasks that they need to complete.
Dashboards make it easy to be able to share with them everything they need to know in a simplified, clean view.
Tasks Dashboard
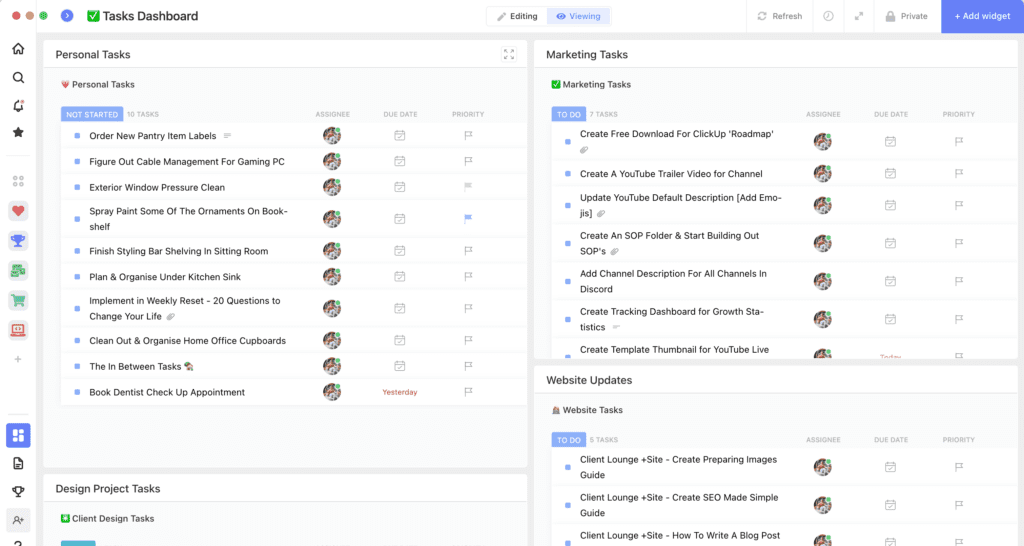
At this point, you’ve probably realised that I have task lists everywhere, in every single space. I know that seems excessive but I like to contextualize my job tasks, however, I also keep them within my Task Dashboard.
In this Dashboard, I have set up widgets that curate my Personal Tasks List, Marketing Tasks, Website Tasks, and Design Project Tasks all within a single Dashboard view. This allows me to review all of my tasks from all over my Workspace, in one place.
How fricking cool is that! So that’s how I review my tasks, even though I have lists everywhere for them.
How Do I Manage This ClickUp Process?
Let’s do a quick breakdown of how I manage all of this on a monthly, weekly and daily basis.
Monthly Basis
Every month I will review all of my spaces, my lists, and my templates.
I’ll make any adjustments to workflows, update any statuses and due dates, or just fix anything that has caused any kind of friction within my process over the last month.
This ensures that everything is working the way it should be and that it’s being used for its intended purpose.
Weekly Basis
Then every week, as part of my weekly reset, I will clean out all of my email inboxes. I’ll add any events or appointments to the relevant Google Calendar.
Anything within my emails that need to be actioned I’ll use the ClickUp Chrome Extension to create a task for it on ClickUp.
I’ll also clear out my Capture Inboxes and move everything into the relevant space or list within ClickUp.
Capture Inboxes
I have two capture inboxes.
The first one is within the Notepad feature of ClickUp.
On the bottom right of the ClickUp App, there is a small square with 4 coloured squares within it. If I click on that you’ll see the Notepad Feature, alternatively, you can press the shortcut key (P).
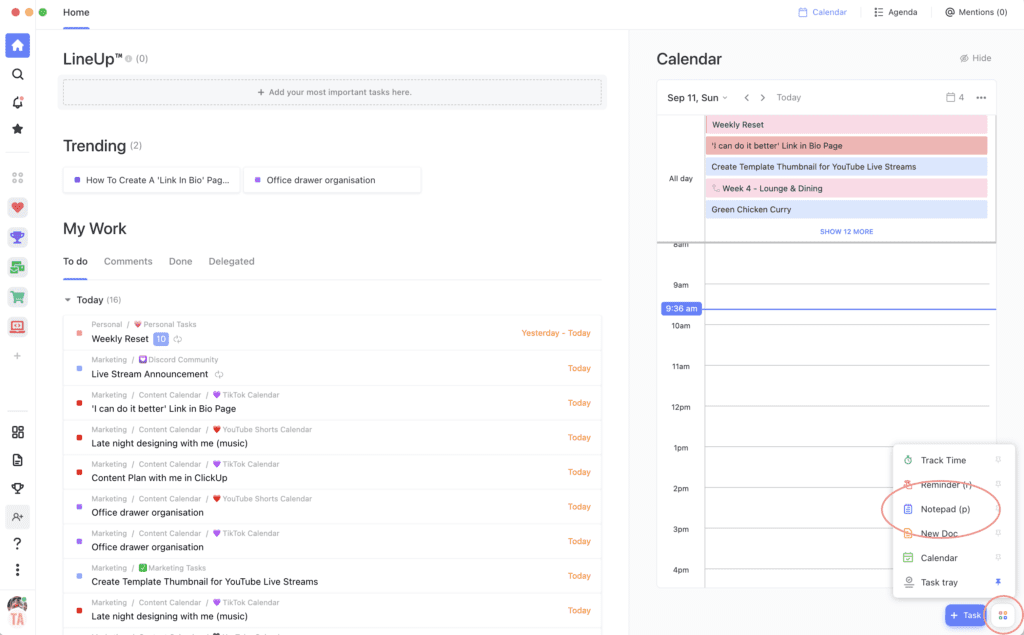
If you don’t see the Notepad you may not have it activated. Head into your ClickUp Workspace settings to activate it.
I use the Notepad feature to complete any brain dumps during the week when I’m feeling overwhelmed. This allows me to get everything out of my head quickly without worrying about putting it on the right list or adding context.
The second Capture Inbox I have is on my phone. I use an app called Microsoft To-Do for my grocery list and to capture ideas or information quickly while I’m on the go or away from my computer.
I do have the ClickUp app on my phone and I can access the Notepad feature from there, however, it takes a few more steps to get to it.
Whereas I have the To-Do App set up as a widget on my phone and all I have to do is click on the plus symbol, a new task pops up and I can type in whatever I need to capture and then it’s done.
So as part of my Weekly Reset, I’ll clear these Inboxes out, move them into the relevant list and contextualise the task as needed.
Time-Blocking
In terms of time blocking, I won’t normally time block during the week because I work a 9 to 5. So I’ve only got an hour or so in the morning, and a couple of hours at night to get work done I don’t need to as there is only ever a couple of tasks on my list.
However, on weekends I will utilise the calendar within ClickUp to time block my time to keep myself on track with everything I need to get done as well as keep myself accountable.
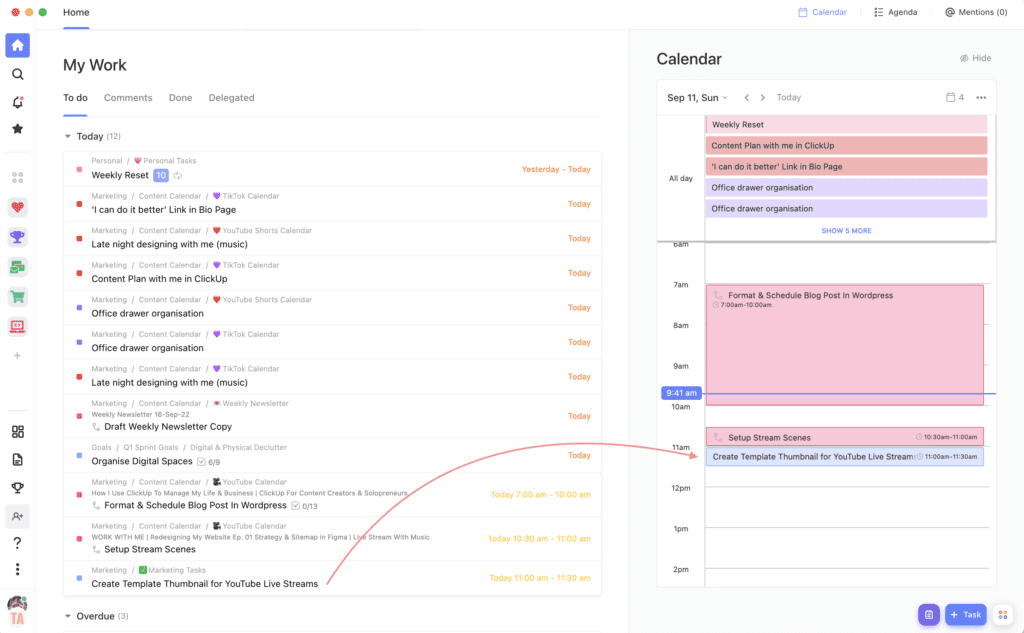
To do this from the Home Section, drag the task from your My Work onto the calendar on the right-hand side at the time that you want to block out for that task.
By default it will block out an hour, to make this shorter or longer just drag the edge of the task block to your desired timeframe.
Conclusion
And that is it, my friends. That is how I manage my entire life using Google Calendar and ClickUp.
If you want to try ClickUp out for yourself, click here to sign up for free.
Disclaimer: I sometimes include affiliate links within my posts for my fave products. If you click and purchase, I may receive a small commission at no extra cost to you.
Hi, this was exactly what I was looking for while I am returning to the workforce. How to organize it. Is there a template for this available? Thanks for the info.
I noticed there is a “Goals” icon on the left side of Clickup under Spaces. Does it serve the same purpose of your Goals section?
Wow, this has been so helpful and informational! Exactly what I needed. I’m currently working on organizing my personal life as a new mom, and new business owner and trying to keep track of clients, business tasks, personal/home tasks has really gotten the best of me! So thank you SOOO much for being so diligent and informational. This has helped me tremendously!!! Good luck in all your future endeavors!