


Email marketing is kinda like doing cardio, like I know I need to do it and it’s going to be really beneficial to my health and all that jazz, but I really just don’t want to.
Like cardio, email marketing isn’t everyone’s cup of tea.
The idea of trying to get people to join your email list is just a little too salesy for me. But if asking for their email address means that in return I get to give them something of kick-ass value, that I’m totally down for!
I’m talking about an opt-in freebie or lead magnet. A free item that you give to your audience in exchange for them joining your email list.
If you haven’t created your freebie yet, then check out this post on How To Create An Opt-In Freebie In Canva.
In this tutorial, I’m showing you how to set up a lead magnet workflow within Flodesk so that it’s automatically delivered when someone opts to receive it.
Flodesk is kind of the new kid on the block when it comes to email marketing software and I’m pretty into it.
The emphasis put on user experience is outstanding, it’s so simple and easy to use, plus the clean minimal interface just makes me so happy.
They also have a complete library of gorgeous email templates for all different email types to get you started.
Organise Your Opt-In Freebie & Graphics
Alright, before we dive into Flodesk we need to do a little prep work first.
The first thing you’ll want to do is create your freebie and export it as a PDF. If you haven’t created your freebie yet see my tutorial on How To Create An Opt-In Freebie In Canva.
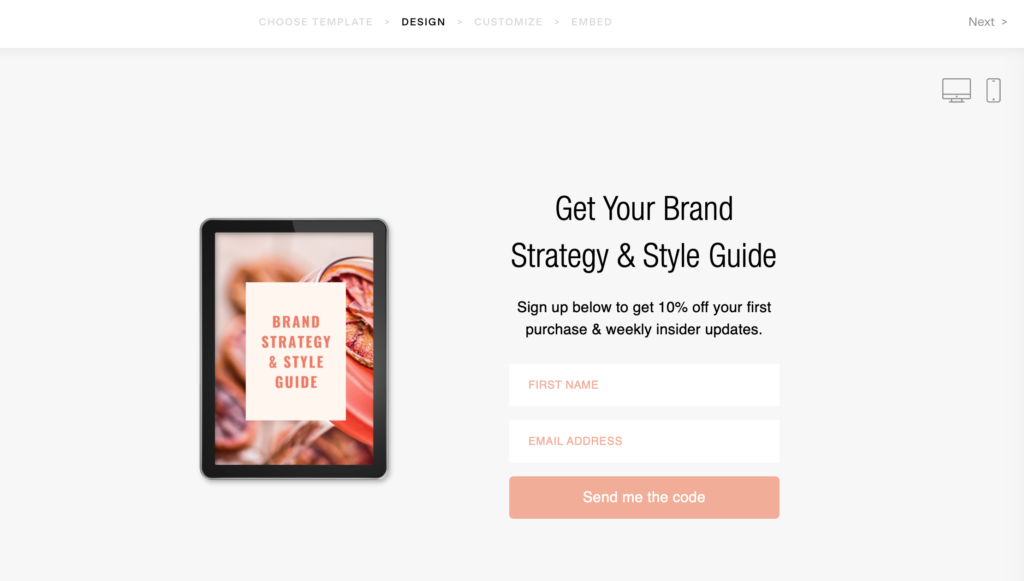
The next thing you’ll want to do is create a mockup of your freebie. This isn’t necessary and there are form options that don’t require an image to be included.
However, it is a great way to showcase the freebie and give a little sneak peek to help entice readers or viewers to opt-in to get your freebie.
To guide you through this process check our my tutorial on 5 Different Ways To Create Mockups In Canva. This gives you both free and paid options within Canva for creating your opt-in freebie mockups.
Now that we have our Freebie ready to go & our mockup graphic if you wish to include one, let’s jump into Flodesk and set up your opt-in so it’s immediately sent to new subscribers when they opt-in.
You don’t necessarily have to do these steps in this order but I just find it easier to do it this way so I don’t have to go back & forth between areas.
Step 1: Create A New Flodesk Segment
So first we need to create a segment for our Freebie. Segmenting is similar to filtering or tagging your audience with specific information.
In this case, we are going to be adding anyone who signs up for our freebie under this particular segment. This lets us know that in future if we come out with a product, service or course relevant to that freebie, this list is already a warm audience for it.
Our segment is also going to act as a trigger once we start building our workflow.
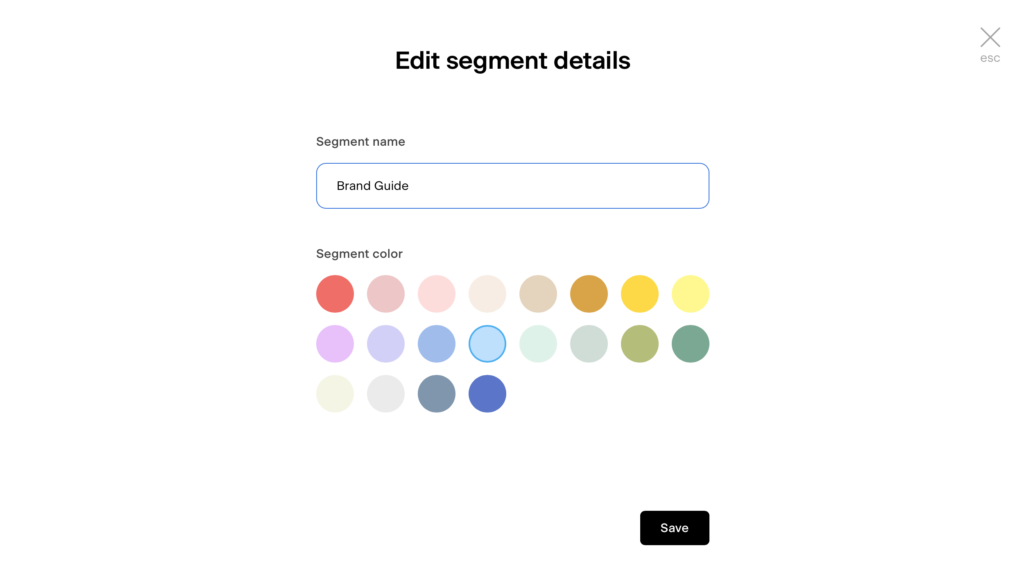
To create a new segment, from your Flodesk Dashboard, select Audience from the navigation. Then select the ‘Segments’ Tab.
On the right-hand side, you’ll now see a button that says ‘+ New Segment’.
Click that and give your segment a name, I usually just name mine as the opt-in freebie I’m attaching to it.
Then pick a colour for your segment and hit ‘Save’.
Step 2: Create A New Flodesk Workflow
Next, we need to create our workflow. This is where we create the automatic process that’s going to send our freebie to anyone who subscribes.
To create a workflow, from your Flodesk Dashboard, select Workflows from the top navigation. Then on the right-hand side select the button that says ‘+ New Workflow’.
This is going to take you to the workflow templates library. You can either opt to use one of the templates available or you can start with a blank workflow.
I’m going to start a blank workflow by selecting ‘start from scratch’ from the left-side navigation.
You’ll need to name your workflow, again I usually just name it as the freebie. Then hit ‘Save’.
Now we are in our blank workflow.
Add A Trigger
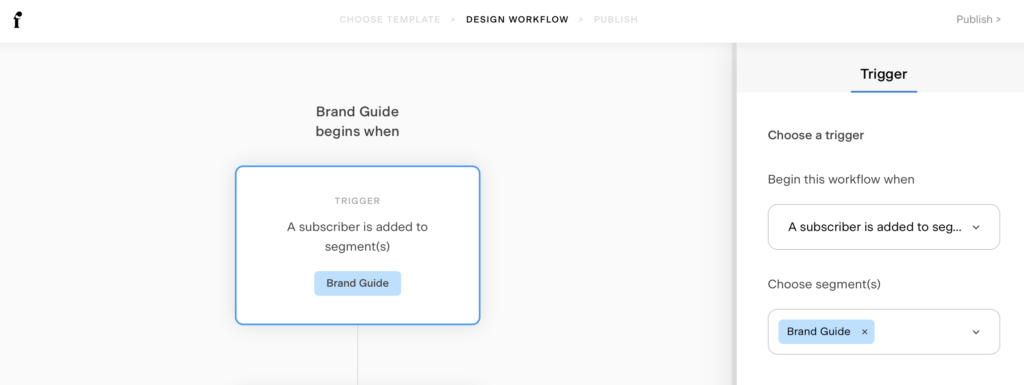
The first thing we need to add is a trigger. This is an action that tells the workflow to begin. Which in this case is when someone opts in to receive a freebie.
Select ‘Add Trigger’ then from the dropdown menu select ‘a subscriber is added to segment(s)’. Then you want to select the segment we just created for your opt-in.
Create & Add An Email
Next, we need to add the email we want to send with our freebie download.
To add a new step to the workflow, click the small plus icon below the trigger action we just created. From the options available, select ‘Email’.
On the right-hand side you have the option to duplicate an existing email or create a new email. We are going to create a new email.
You’ll now be able to see the email template library within Flodesk. Which we want to filter to see only lead magnet delivery emails. To do this select the ‘Welcome’ category on the left-hand side.
Choose a template that you want to use by clicking on ‘view details’ and then ‘customise’.
You can then go through and customise the colours, fonts, text and all those small details within the email.
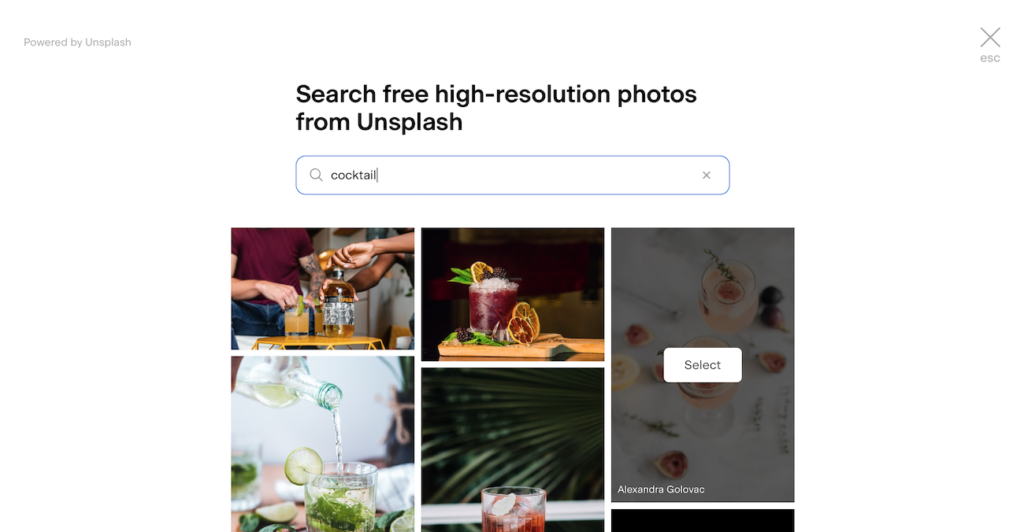
A great new feature within Flodesk is its integration with Unsplash. So you can add stock images from Unsplash directly from within Flodesk.
To do this just select the image placeholder, and on the right you’ll see ‘Add a Photo from Unsplash’. Select that and there will be a pop-up allowing you to search within the Unsplash library for photos.
Then just hit ‘select’ on your chosen image and it’ll be added to your email. So easy!
Add Freebie PDF to Email
Now, to add your Freebie so that when they click the ‘download’ button it automatically downloads for them.
To do this you’ll need to select the button within the template so the editing panel appears on the right-hand side.
From the tabs along the top, select ‘Link’. You’ll now be able to either paste a link, or below that you’ll have the option to attach a file.
Click ‘Attach File’ then ‘Upload File’, and locate your freebie within the upload screen and hit ‘Upload’.
Once that’s uploaded, your freebie PDF is now hosted directly within Flodesk and will be downloadable from the button with your email.

Once you’re happy with the email and your freebie PDF is attached, select ‘finish’ from the top right of the screen. You’ll now be back within your workflow.
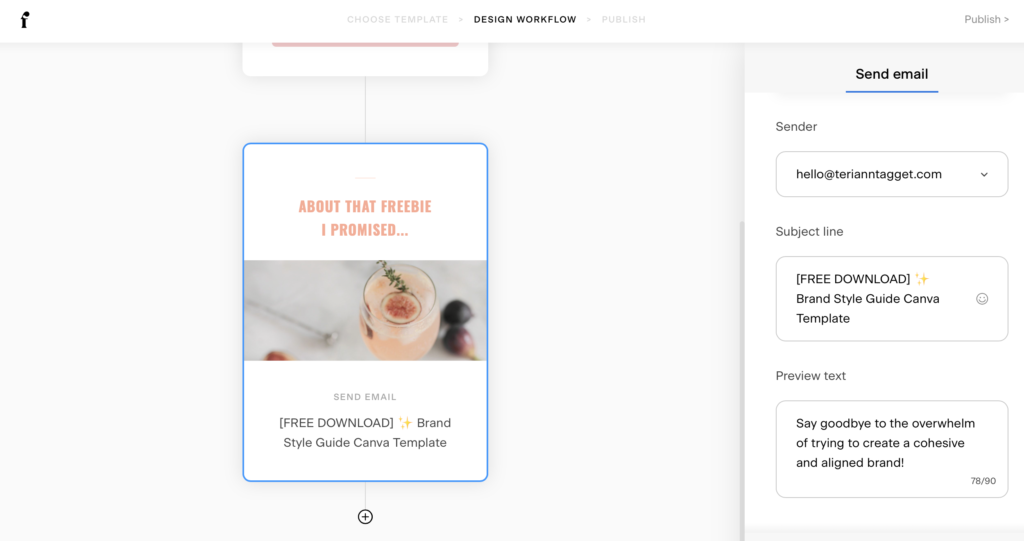
To finish off your email, on the right-hand side you’ll want to scroll down and add a subject line and preview text for your email.
We’ve now completed the setup of the freebie workflow. However, if you have a welcome sequence workflow for new subscribers, which I highly recommend, you could then add another action such as a time delay, followed by another action of adding them to the segment connected to your welcome sequence workflow.
The last step in your workflow is to publish it, select ‘publish’ from the top right. Then ‘publish now’.
Your workflow will then be published and you’ll be returned to the workflow dashboard.
Step 3: Create A New Flodesk Form
The last step in our freebie delivery process is to create the actual form where people will be able to opt-in to your freebie and in turn your email list.
From the top navigation select ‘Forms’. On the right-hand side you’ll see a button that says ‘+ New Form’.
Once you select that you’ll be taken to the form template library where you’ll be able to choose the type of form you want.
You have the option of a popup form, an inline form or a full-page form.
Select the form you want to use, for this tutorial I’m going to be using the inline form which is great for adding within your actual content such as in blog posts or your blog footer.
Hover over the form you want and select ‘customise it’. You’ll then need to select the segment you want to add people to once they opt in. Select the segment we created earlier that links to our workflow.
Just like with the email, you can now customise this however you want. You can also add in your freebie mockup if you’ve chosen a form with an image block.
When your form is customised to your liking, select ‘Next’ from the top right corner.
Choosing Your Flodesk Form Settings
You’ll now be asked a series of questions regarding actions to do with your form.
Such as whether you want to have a double opt-in, this is where Flodesk will send a confirmation request to the new subscriber to confirm their email. The subscriber needs to hit confirm on the email before they are added to the segment. This is a preferable method to prevent spam emails from getting added to your list.
You’ll also be asked whether you want to be notified when someone joins your list. This is my personal preference but I choose not to be notified.
Lastly, you’ll be asked what you want to happen once someone subscribes, do you want a success message displayed or would you want to redirect them to a different URL?
For an inline form, I prefer to just add a success message because generally, these are within blog posts so I don’t want to take them away from the content they’re reading. You can also customise your success message to match your brand voice.
However, if you were using a full-page form you could have it redirect to a page showing some of your best content or to a product or course page.
After you’ve answered the questions, select ‘next’ and the final setup page will include the embed codes along with instructions on how to add this to your blog or website.
If you’ve opted for a full page form you’ll only receive a URL link instead of an embed code.
Lastly, once you’ve embedded your form on your website give it a test run to ensure it all works correctly by opting into your form from your website.
There we are a completely automated workflow for delivering your opt-in freebie. I hope you found this helpful.
Disclaimer: I sometimes include affiliate links within my posts for my fave products. If you click and purchase, I may receive a small commission at no extra cost to you.


0
Comments