


Look, you know it, I know, so I’m not even going to waste any time talking about the importance of building an email list, well at least not in this post.
Long story short, if you want to be able to monetise your blog or sell products online, having an engaged email list is going to be your biggest money maker BY FAR. Honestly look it up, I’m not wrong!
So in this tutorial, I’m helping you get one step closer to finally getting started with building your email list, by showing you how to create your first opt-in freebie using my absolute favourite software EVER, Canva!
Also, I’m going to give you a bonus step at the end on how you can make your workbook interactive by adding fillable sections. So make sure you stick around for that.
Step 1: Outline Your Freebie
Before we dive into creating the design, we first have to come up with a Freebie idea and outline what is going to be included within the freebie.
You need to create the content first, then dive into the layout and design.
The reason is that focusing on just the content first and really putting thought and research into it, will allow you to create something truly valuable for your audience.
Whereas if you try to write the content on the fly as you’re creating the design it’s not going to flow as well, as there isn’t as much strategy behind it. It’s so easy to get caught up in the design and give less priority to the content. Which is not what we want! We want to be providing high-value content.
You’ll need to figure out what kind of Freebie you are going to create.
Ask yourself; Does it align with my audience & make sense for my brand? What quick wins will it give my audience? Will it be a workbook, a guide, a template, a checklist, free resource page? etc.
Step 2: Select Your Freebie Template
Now that you’ve nailed down the purpose and outlined the content of your freebie, it’s time to jump into the design.
If you haven’t jumped on the Canva train yet, I highly recommend checking it out.
From your Canva Dashboard, you’ll want to use the search bar at the top of the page to view all the templates available. Here you can either search by template type or size.
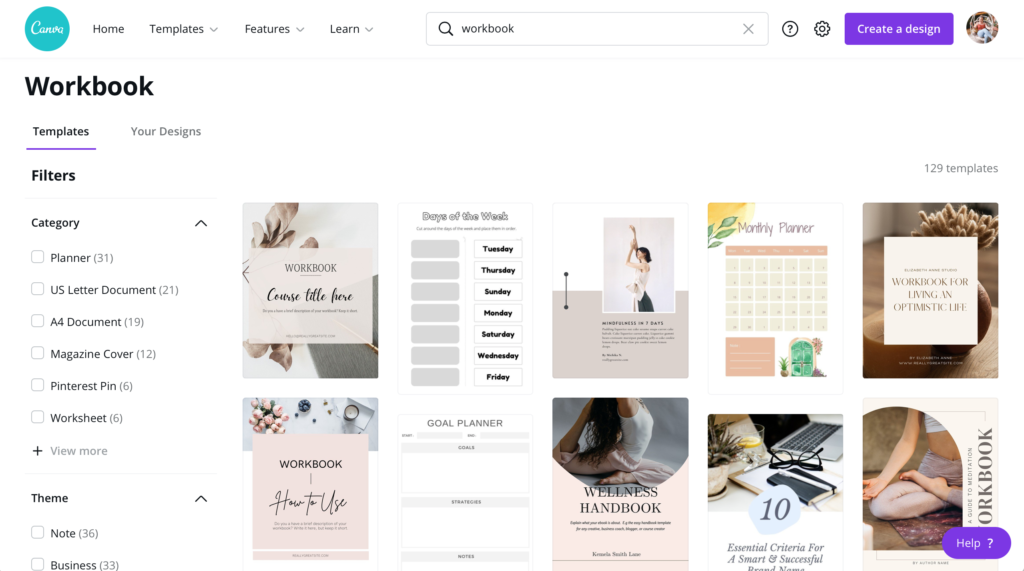
If you intend for your freebie to be printed, you’ll want to choose a template with the right dimensions as your standard paper size. For example, I’m in Australia so I would opt for A4 size, If you’re in the US you may want to choose US Letter.
If you don’t intend for your freebie to be printed then you can just search by template type. For instance, if you are creating a workbook search for a workbook, if it’s a checklist search for a checklist etc.
You also want to select a template that has a layout that works for your freebie.
If it’s a workbook, I like to look for a template that has multiple pages included so I have different layout options of the same design style.
Once you’ve chosen your template, click on it to automatically open it within the design editor.
Step 3: Customising Your Freebie Template
Once you’re in the design editor, I suggest adding all relevant layout options you think you’ll want to include to your design.
This will allow you to make bulk changes to all the pages within your design at once so you don’t have to do it later.
Once you’ve added all the pages and placed them in the correct general order, we are going to start customising the design to match our brand.
If you haven’t set up a Brand Kit within Canva check out my tutorial on A Quick Guide To Setting Up Your Brand Kit In Canva.
Change Colours & Fonts
First up is changing the colours of your elements and fonts – to do this simply click on an element and then on the top left click on the coloured box, from the dropdown menu select your colour or type in the hex code.
The trick here is once you’ve selected your colour, at the bottom of the menu you’ll see an option to ‘Apply to all pages’, this means that anywhere within your design that the original colour appears, it will now be changed to the new colour you’ve selected.
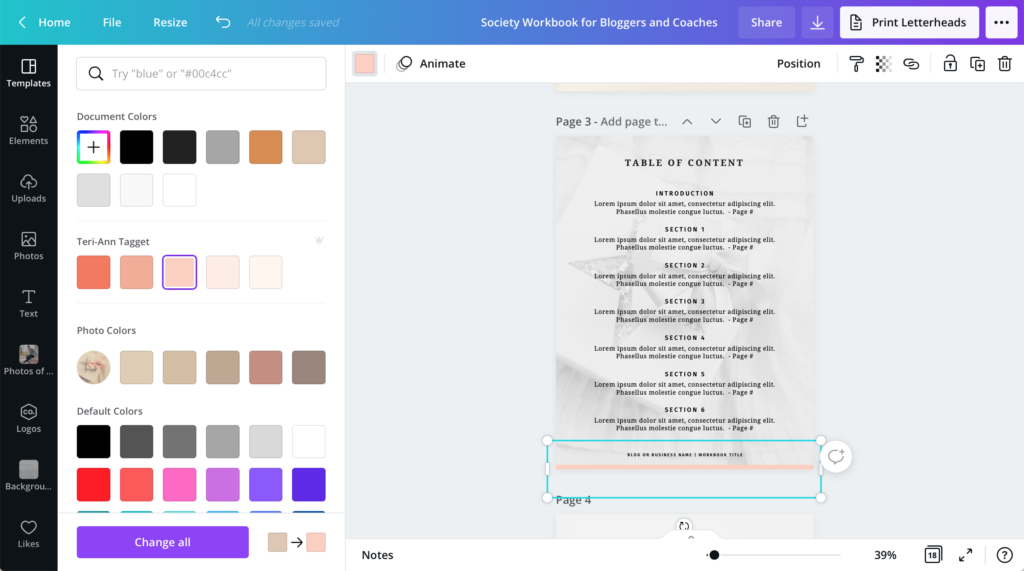
This makes it so much quicker to customise your design as you don’t have to manually adjust every single element.
Next, we are going to update our fonts, unfortunately, that bulk change option doesn’t apply to fonts so we do have to manually adjust each individual text box.
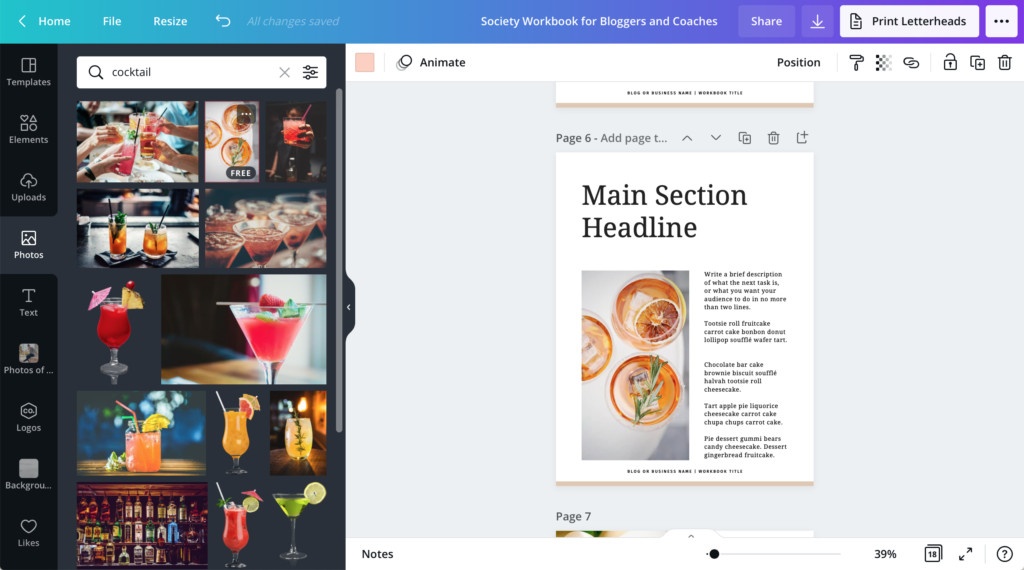
Changing Images
Our final styling step is to change out the images within the design. If you have your own images you want to include then you can just drag them into Canva and they’ll be added under the ‘Upload’ Tab on the left.
Otherwise, you can search within Canva’s vast library of images from the Photos Tab.
If you can’t see the Photos Tab on your left-hand navigation, scroll down on your navigation until you see 3 small dots and ‘More’. Click on this and you should see the Photos tab appear. Once you’ve clicked on it, it should now remain available in the left-hand navigation.
Now you can just drag and drop your chosen images over the template images to replace them.
To adjust any of the image placements, just double-click on the image to move it around within the grid or frame.
Step 4: Adding In Your Freebie Content
Now it’s time to add your content within the design.
My tip here is to utilise the duplicate page option to quickly make a copy of a particular page layout you’ve already styled, this keeps your freebie consistent and saves time on having to restyle from the template file.
URL Hyperlinks
Don’t forget to include hyperlinks within the footer to your website or socials, if you have blog posts that go hand in hand with the freebie, make sure to include links to those within your freebie also.
To add hyperlinks, highlight the text that you want to turn into a link, then in the top right, you should see a small link icon, if you are on a smaller screen you may need to click the 3 dots to access these additional menu items.
Once you’ve clicked on the link icon you can enter or paste the URL where you want the text to link to and press enter to add it.
Canva will automatically add an underline beneath the linked text, to remove this underline just select the text box, select the underline text icon, and then press it again. This removes the underline from the text but the link is still active.
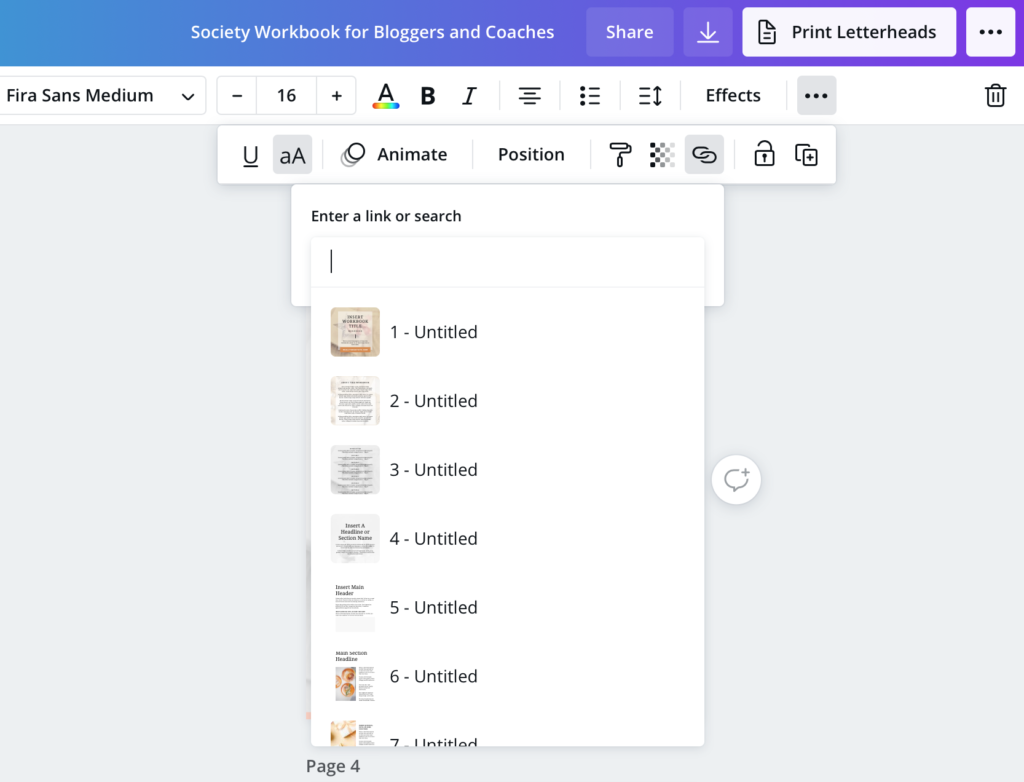
Content Quick Links
Another awesome feature within the link option is that you can now link to pages within your design.
This is really handy if your freebie is quite long and you have a table of contents, you can create quick links within your table of contents.
Same as with the URL link, highlight the text you want to link or the entire text box. Click on the link icon, and you should see a dropdown with all the pages within your design. Click on the page you want to link to and press ‘go to page’. Boom, done!
Now anyone who downloads your freebie can easily navigate to the pages they need right from the table of contents.
You also want to ensure you are including a call to action or at least a clickable link at the end of the freebie.
Once they’ve completed your freebie, what do you want them to do next? Tell them & make it even easier by providing a link directly to where you want them to go. Whether it’s your website, YouTube channel, or Instagram account. Link it!
Step 5: Review & Download Your Freebie
Alright, we’ve completely customised our freebie to match our brand, we’ve added in all our valuable content and included all relevant links and CTA’s. Now it’s time to download our freebie.
To download our freebie, just click the small downwards pointing arrow on the top right to open the download pop-up.
Here you’ll want to choose the file type ‘PDF Standard’ – This helps keep the file size small which makes it easier and quicker to send via your email software, as most of them will have limits to the file sizes you can upload.
Now just hit ‘Download’.
Once it’s downloaded be sure to review the entire PDF, make sure everything is aligned, and nothing is cut off, check for spelling mistakes and ensure all the links within the PDF work and link to where they are supposed to.
Bonus Step: Make It Interactive!
Now for the bonus step! If your freebie is a workbook or something that requires your audience to write on or tick off then this is going to really level up your freebie.
We are going to make your freebie completely interactive by making the working areas of your freebie fillable, so it can be filled out in its digital form without the need for a physical copy to be printed.
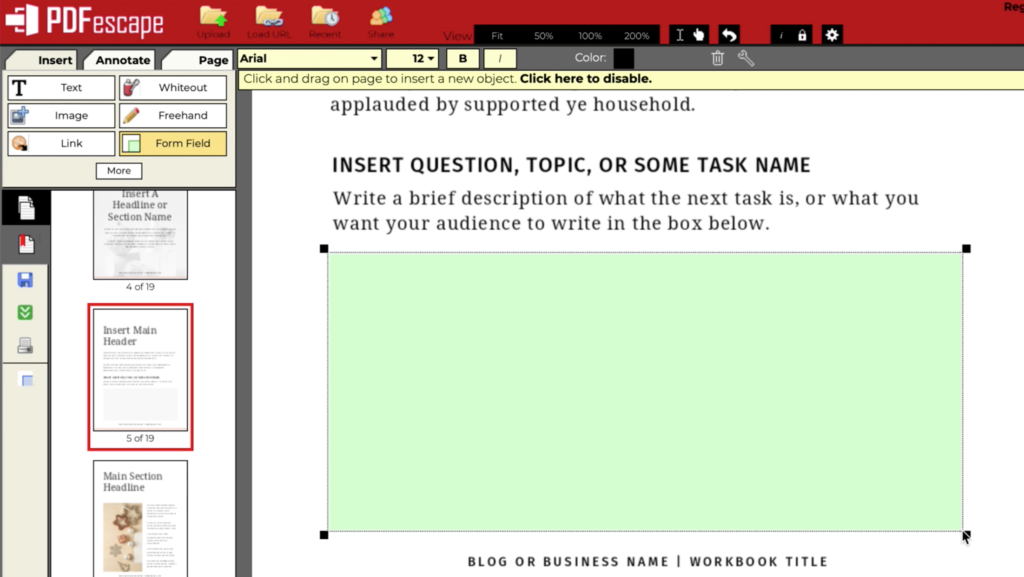
To do this we are going to use a website called PDF Escape which is a free editor and form filler.
Head to PDF Escape and on the home page you’ll have the option to drop or upload your PDF, go ahead and upload your freebie PDF.
It’ll take a few seconds to a minute to upload depending on the size of your PDF.
Once it’s uploaded it will automatically direct you to the PDF editor screen. Here we are going to add our fillable sections.
Fillable Text Areas
On the left-hand side select ‘Form Field’, make sure the text type is selected from the dropdown and hit select.
Now all you need to do is click and drag your cursor over the spot you want people to be able to type. You can also adjust the size of the font you want to appear and it also gives you a few different font options.
Now just keep going through your workbook and adding these fillable boxes anywhere they are needed.
Interactive Checkboxes
The second thing we can add to really level up your freebie is interactive checkboxes.
If you’ve created a checklist or you just have check items within your workbook then you can add these within this Form Filler also.
On the left side, you want to click on ‘Form Field’ once again and change the type to ‘Checkbox’.
Then just like the text spots, click and drag your cursor over the checkbox spot within your freebie.
One thing to note here is each time you add a checkbox you’ll need to untick the checkbox before adding the next one. Otherwise, when you download your PDF the box will already be ticked, so you want to make sure they are unticked before you download it.
Other Interactive Options
There is also a bunch of other form options you can play around with such as dropdown menus, reset or submit buttons.
These are added the same way as the fillable forms and checkboxes.
To add dropdown options or adjust the settings for any of these items you’ll just need to click the little spanner at the top of the page, or to delete the item just click the trash can.
Then once you’ve finished adding all the fillable or interactive elements to your PDF it’s time to download.
To download just click on the green icon with the downward-facing arrows on the left-hand side that says ‘Save & Download PDF’.
Your PDF will then automatically download with the interactive elements. As always double check each element does what it’s meant to and has the right font, font size and all the checkboxes are unticked.
Now you have a completely customised, interactive freebie ready to share with your audience!
If you follow along on this tutorial to create your interactive freebie, be sure to include a link to it in the comments below, I’d love to check it out!
Disclaimer: I sometimes include affiliate links within my posts for my fave products. If you click and purchase, I may receive a small commission at no extra cost to you.


0
Comments